Some organizations need a signature line at the bottom of their invoices for their clients to sign. By following the steps below, you’ll be able to add this feature in your invoices.
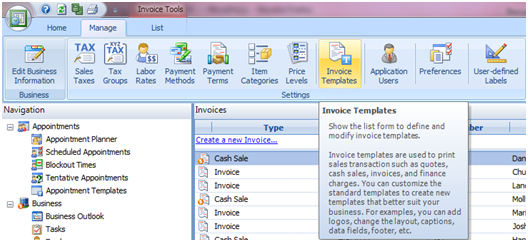
Begin by going under the Manage Tab and clicking on Invoice Templates as shown below.
Master Your Shift Scheduling
Snap Schedule 365 Automates It All!
Discover the power of automatic shift callouts, open shift notifications, time off & overtime management.
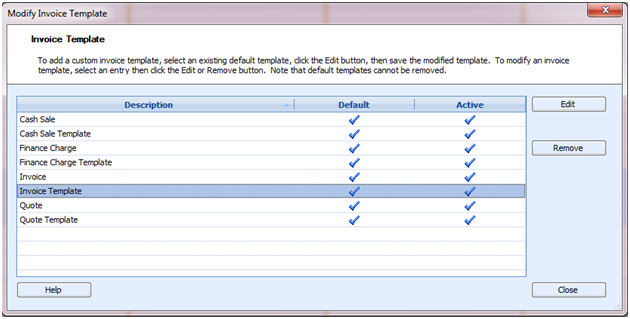
Next, select Invoice Template and click the Edit button to bring up the Customize Invoice Template window. Alternatively you can double-click on Invoice to bring up the editing window.
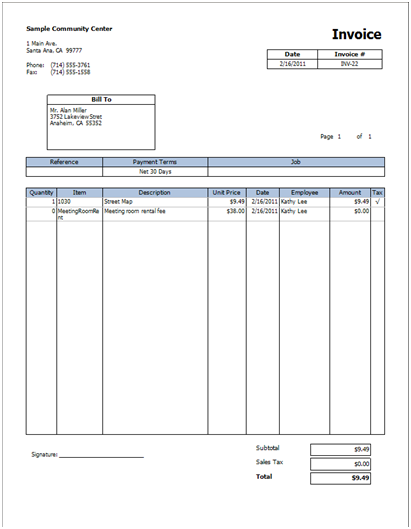
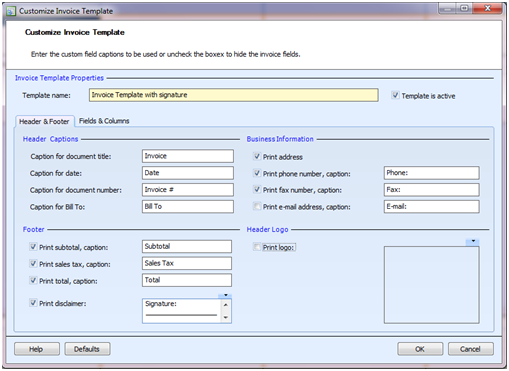
Next, enter a name for this template. To add a signature line in the disclaimer section, go to the bottom left corner of the window and enter your text in the Print Disclaimer field. You can type in “Signature” or “X” and then add a section of repeated underscores to create a line to sign on. You can make this shorter or longer depending on your preference. You’ll then want to make sure that the Print Disclaimer box is checked so that this field will appear on your invoice. Save the invoice template.
Now when you print out your invoice, you’ll have this signature line added in the bottom left hand corner of the page. Don’t forget to select this custom template when creating your invoice.